Pipeline 1 : Body Modelling Part 1 - 6


Pipeline 1 : Body Modelling Part 1 - 6 

Part 1:


Blocking out the model initially is a simple process only made harder by the Pre Planning needed to create a smooth transition into modelling the rest of the body.


Part 2:


Seeing as how this design is very similar to alot of cartoon characters, made from simple shapes connected to each other. Modelling the arm was very simple through connecting a tube structure to the already made torso.

Part 3:


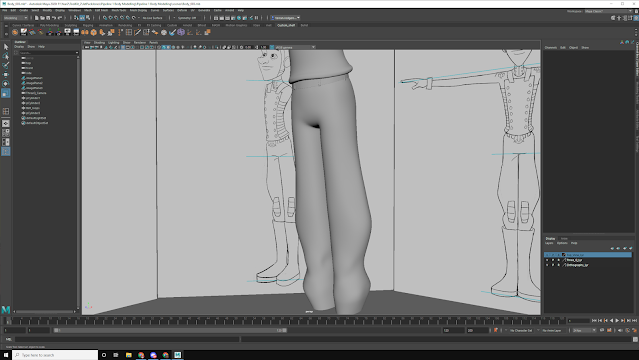
The legs where harder due to getting it close to the middle line. Going over this causes trouble when mirroring the model. However it was a fairly painless process and a simple task as it is its own piece of geometry

Part 4:


The boots where simple, even when taking into account creating good geometry for skinning. This was a simple and fairly fun process.

Part 5:


The way of making hands shown in part 5 is really useful and is a method I will be using in the future. These fingers have a defined style so the level of sculpting might vary depending on how I model characters in the future.

Part 6:


Finishing up and mirroring the model was a easy process, finishing up the body and then importing the head into the scene and creating the final model of the character was a good moment. Seeing the character finished I have a few part I would change if I did it again, but overall I am really happy with how the body and to a lesser extent the head came out.


Comments

Popular posts from this blog

Tool Kit 2: Depth of Field

  Tool Kit 2: Depth of Field This tutorial came at the perfect time for me as I was already messing around with depth of field in test scenes trying to understand it. This tutorial made it a lot clearer how to use it and how powerful it is as a system in Arnold. There is a lot of functionality in the Arnold camera and as such there is a lot of renders below to show each of the settings. First is the Filter map a system that works as a sort of vignette to the camera. A well as a load of setting to do with the shape of the blur including aperture blades as well as aperture aspect ratio. These can creating interesting effects if used in a stylistic manner. The main settings in the tutorial where Focus distance and Aperture size as there control how much of the scene is in focus and where in the z axes this area sits. Filter Map. Depth of Field 1. Aperture Blades : 3. Depth of Field 2.

Major Creature 4 Texturing

  Major Creature 4 Texturing The texturing process is one I enjoy and feel confident in because of this I was able to sit through the process in a few days and generate the outcome. I came back to these textures a few days later to darken the textures over all once I saw then in Arnold. I also increased the level of dirt in the textures as they looked to clean.

Tool Kit 2: Physical Sky

Tool Kit 2: Physical Sky In this tutorial I learnt about the physical sky in Arnold and how it can be used to easily mimic time of day when rendering exterior shots for animations. Using a variation of elevation, Turbidity, intensity and Azimuth you can create the different angles of sky light you would see in real life. Other settings that can be used to push a stylistic approach include sun tint, sky tint and sun size. These can be used to create strange effects that are stylised and aren't meant to look photo real. Day1. Mid Day. Morning/Evening. Foggy Day. Stylised Lighting.